☁ Implement DevOps in Google Cloud: Challenge Lab | logbook
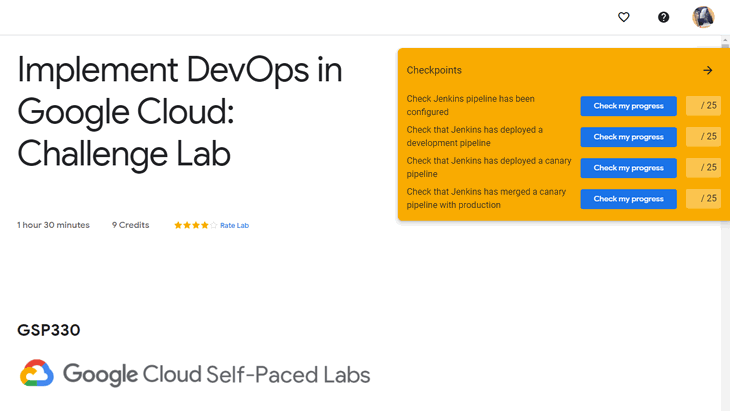

In this article, we will go through the lab GSP330 Implement DevOps in Google Cloud: Challenge Lab, which is an expert-level exercise on Qwiklabs. You will practice the skills in implementing a continuous deployment pipeline using the Jenkins build and deployment automation tool.
Topics tested:
- Use Jenkins console logs to resolve application deployment issues.
- Deploy and a development update to a sample application for Jenkins to deploy using a development pipeline.
- Deploy and test a Kubernetes Canary deployment for a sample application.
- Push the Canary application branch to master and confirm this triggers a production pipeline update.
Task 1: Configure a Jenkins pipeline for continuous deployment to Kubernetes Engine
Inspect Provisioned Resources
-
In the Cloud Console, navigate to Kubernetes Engine > Clusters to inspect the provisioned cluster named
jenkins-cd. -
Navigate to Source Repositories, click on
sample-appand review the Jenkinsfile in the root of that repository. -
Also, review the YAML files for the three types of deployment (production, canary, and dev) in the
sample-app/k8sdirectory. -
Navigate to Compute Engine > VM instances, click on the SSH button of the instance named
kraken-jumphost. -
In the SSH window, run the following command to configure the compute zone:
gcloud config set compute/zone us-east1-b -
(Optional) confirm that your cluster is running by executing the following commands:
gcloud container clusters list
kubectl cluster-info
Install and Setup Helm
-
You will use Helm to install Jenkins from the Charts repository. Helm is a package manager that makes it easy to configure and deploy Kubernetes applications. To install Helm, run the following commands to fetch the Helm installer script, and then execute it locally.
curl -fsSL -o get_helm.sh https://raw.githubusercontent.com/helm/helm/master/scripts/get-helm-3 chmod 700 get_helm.sh ./get_helm.sh -
Setting up and updating Helm by running the following commands:
helm repo add stable https://kubernetes-charts.storage.googleapis.com/
helm repo update
Configure and Install Jenkins
-
Use git to clone the lab’s sample code:
git clone https://github.com/GoogleCloudPlatform/continuous-deployment-on-kubernetes.git -
Change to the following directory:
cd continuous-deployment-on-kubernetes -
To configure and install Jenkins, run the following command to deploy with the Helm CLI.
helm install cd stable/jenkins -f jenkins/values.yaml --version 1.2.2 --waitThis command may take several minutes to complete.
-
Once the command completed, ensure the Jenkins pod goes to the Running state and the container is in the READY state:
kubectl get podsExample Output:
-
The Jenkins chart will automatically create an admin password for you. To retrieve it, run:
printf $(kubectl get secret cd-jenkins -o jsonpath="{.data.jenkins-admin-password}" | base64 --decode);echo

Connect to Jenkins
-
Go back to the Cloud Console, then open a cloud shell and run the following command to get the credentials for your cluster:
gcloud container clusters get-credentials jenkins-cd --zone us-east1-b -
Run the following command to setup port forwarding to the Jenkins UI from the Cloud Shell.
export POD_NAME=$(kubectl get pods --namespace default -l "app.kubernetes.io/component=jenkins-master" -l "app.kubernetes.io/instance=cd" -o jsonpath="{.items[0].metadata.name}")
kubectl port-forward $POD_NAME 8080:8080 >> /dev/null &
(You don’t need to configure the Jenkins service account because it has already been created during provisioning.)
-
To get to the Jenkins user interface, click on the Web Preview button in the cloud shell, then click Preview on port 8080.
-
You should now be able to log in with the username
adminand your auto-generated password.

Clone the Sample App Repository and Create the Production Namespace
-
Go back to the SSH window, clone the
sample-appsource code from the Cloud Source Repository by running the following command:gcloud source repos clone sample-app --project=<YOUR-PROJECT-ID>Remember to replace
<YOUR-PROJECT-ID>with your GCP project ID -
Change to the sample application directory and then create the Kubernetes namespace to logically isolate the deployment:
cd sample-app
kubectl create ns production
Creating the Jenkins Pipeline
Adding your service account credentials
Configure your credentials to allow Jenkins to access the code repository. Jenkins will use your cluster’s service account credentials in order to download code from the Cloud Source Repositories.
-
In the Jenkins user interface, click Manage Jenkins in the left navigation then click Manage Credentials.
-
Click Jenkins
-
Click Global credentials (unrestricted).
-
Click Add Credentials in the left navigation.
-
Select Google Service Account from metadata from the Kind drop-down and click OK.

Configure the Jenkins job
After configuring your credentials, follow these steps to configure a Pipeline job.
-
Click Jenkins to return the welcome page.
-
Reload the page a few times until you see a pipeline job named sample-app in the Jenkins user interface.
(If you fail to get any job, click Jenkins > New Item in the left navigation to create the multibranch pipeline.)
-
Click on the job name of sample-app.
-
Click Configure in the left pane.
-
In the configuration page, enter
sample-appas the Display Name in the General section. -
In the Branch Sources section, click on Add source and choose Git from the dropdown menu.
-
Copy the Cloud Source URL of the sample-app repository to the Project Repository field. The URL should look like this:
https://source.developers.google.com/p/<YOUR-PROJECT-ID>/r/sample-appSelect the service account for your GCP project from the Credentials dropdown list.
-
Check Periodically if not otherwise run in the Scan Multibranch Pipeline Trigger section, and then select 1 minute for the interval.
-
Scroll to the bottom and click on Save.
-
If you correctly configured the pipeline, you will see Finished: SUCCESS at the end of the Scan Multibranch Pipeline Log.


Examine the Console Output from the Jenkins Pipeline
-
Click on sample-app » master under Build Executor Status in the left pane, then click on the job under Build History.
-
Click Console Output in the left navigation to monitor the build process.
This process takes about five minutes to complete.


Task 2: Push an update to the application to a development branch
-
Go back to the SSH window, run the following command to create a development branch in the
sample-appdirectory.git checkout -b new-feature -
Open the main.go file with
vi,nano, or the Cloud Shell Editor. -
Update the version in the following line:
const version string = "1.0.0"to
const version string = "2.0.0"then save the change.
-
Open the html.go file and change the two instances of
<div class="card blue">to<div class="card orange">. -
Commit and push your changes by running the following commands:
git config --global user.email "you@example.com" git config --global user.name "Your Name" git add Jenkinsfile html.go main.go git commit -m "Version 2.0.0" git push origin new-feature -
Go to the Jenkins user interface, click Scan Multibranch Pipeline Now if you want to trigger the build immediately.
Task 3: Push a Canary deployment to the production namespace
-
Go back to the SSH window, run the following command to create a canary branch in the
sample-appdirectory.git checkout -b canary -
Merge the change from the development branch:
git merge new-feature -
Push the canary to the Git server:
git push origin canary -
Go to the Jenkins user interface, click Scan Multibranch Pipeline Now if you want to trigger the build immediately.
Task 4: Promote the Canary Deployment to production
-
Go back to the SSH window, run the following commands to merge the canary branch, and push it to the Git server.
git checkout master git merge canary git push origin master -
Go to the Jenkins user interface, click Scan Multibranch Pipeline Now if you want to trigger the build immediately.
Congratulations! You completed this challenge lab.
Demonstration Video
This browser does not support the YouTube video player. Watch on YouTube
⏱Timestamps:
00:00 Lab Overview
00:48 Review previous Lab Exercise GSP051
02:15 Inspect the provisioned lab resources
03:26 Task1: Configure a Jenkins pipeline for continuous deployment to Kubernetes Engine
04:52 Configure and Install Helm
08:16 Retrieve and decode the Jenkins Admin password
09:05 Configure kubectl proxy to access the Jenkins UI
09:53 Clone sample-app source files from Cloud Source Repository
11:08 Create the production namespace
12:00 Add your service account credentials to Jenkins
12:59 Configure the multibranch Jenkins pipeline job
17:24 Examine the console output from the Jenkins pipeline
22:42 Task2: Push an update to the application to a development branch
27:45 Task3: Push a Canary deployment to the production namespace
30:30 Task4: Promote the Canary Deployment to production
References:
Keep on reading:
