☁ Build a Website on Google Cloud: Challenge Lab | logbook


In this article, we will go through the lab GSP319 Build a Website on Google Cloud: Challenge Lab, which is an advanced-level exercise on Qwiklabs. You will practice the skills and knowledge for website architectures available to be scalable with microservices on Google Kubernetes Engine.
The challenge contains 6 required tasks:
- Download the monolith code and build your container
- Create a kubernetes cluster and deploy the application
- Create a containerized version of orders and product 1. Microservices
- Deploy the new microservices
- Create a containerized version of the Frontend 1. microservice
- Deploy the Frontend microservice
Task 1: Download the monolith code and build your container
Hint: Refer and modify the procedures in the first two sections of the lab Deploy Your Website on Cloud Run
First of all, you need to clone the project repository from GitHub to your Cloud Shell environment.
git clone https://github.com/googlecodelabs/monolith-to-microservices.git
Run the setup.sh to install the NodeJS dependencies for the monolith code
cd ~/monolith-to-microservices
./setup.sh
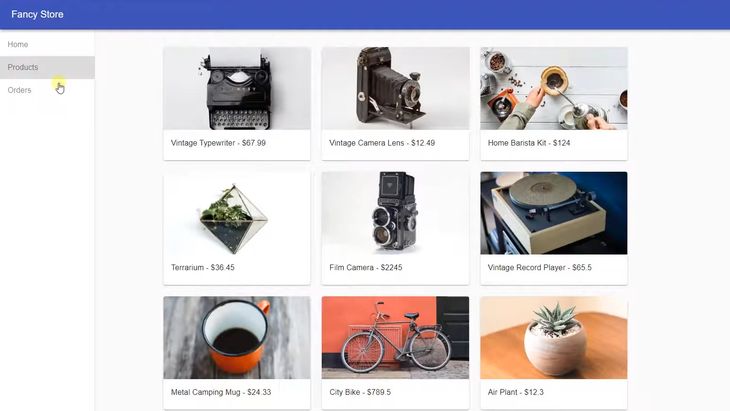
Before building the Docker container, you can preview the monolith application on port 8080 by running the following commands to start the web server:
cd ~/monolith-to-microservices/monolith
npm start
Next, enable the Cloud Build API and submit a build named fancytest with a version of 1.0.0 using the following commands:
gcloud services enable cloudbuild.googleapis.com
gcloud builds submit --tag gcr.io/${GOOGLE_CLOUD_PROJECT}/fancytest:1.0.0 .
In the Cloud Console, navigate to Cloud Run and wait for the successful build of the container.
Task 2: Create a kubernetes cluster and deploy the application
Hint: Refer to in the lab Deploy, Scale, and Update Your Website on Google Kubernetes Engine
Make sure that you:
- create the resources in the
us-central1-azone, and - the cluster is named
fancy-cluster.
Use the following commands to set the default zone and create the Kubernetes cluster:
gcloud config set compute/zone us-central1-a
gcloud services enable container.googleapis.com
gcloud container clusters create fancy-cluster --num-nodes 3
After the cluster is ready, you need to deploy the application. Make sure that you
- name the deployment to be
fancytest, - expose the service on port 80, and
- map it to port 8080.
Run the following commands:
kubectl create deployment fancytest --image=gcr.io/${GOOGLE_CLOUD_PROJECT}/fancytest:1.0.0
kubectl expose deployment fancytest --type=LoadBalancer --port 80 --target-port 8080
Wait till the GKE creates an external IP and a Load Balancer for the application.
Task 3: Create a containerized version of your Microservices
Hint: Refer to the lab Migrating a Monolithic Website to Microservices on Google Kubernetes Engine
Make sure that you:
- submit a build named “orders” with a version of “1.0.0”, and
- submit a build named “products” with a version of “1.
Run the following commands to build your Docker container for the Orders Microservice and push it to the gcr.io:
cd ~/monolith-to-microservices/microservices/src/orders
gcloud builds submit --tag gcr.io/${GOOGLE_CLOUD_PROJECT}/orders:1.0.0 .
Similarly, repeat the step for the Products Microservice:
cd ~/monolith-to-microservices/microservices/src/products
gcloud builds submit --tag gcr.io/${GOOGLE_CLOUD_PROJECT}/products:1.0.0 .
Task 4: Deploy the new microservices
Make sure that you:
- name the deployment to be “orders” and “products”, and
- expose the services on port 80.
Run the following commands to deploy the Orders Microservice:
kubectl create deployment orders --image=gcr.io/${GOOGLE_CLOUD_PROJECT}/orders:1.0.0
kubectl expose deployment orders --type=LoadBalancer --port 80 --target-port 8081
Run the following commands to deploy the Products Microservice:
kubectl create deployment products --image=gcr.io/${GOOGLE_CLOUD_PROJECT}/products:1.0.0
kubectl expose deployment products --type=LoadBalancer --port 80 --target-port 8082
Wait till the GKE creates external IPs for the “orders” and “products” deployments.
Task 5: Configure the Frontend microservice
Use the nano editor to replace the local URLs with the IP addresses of the new microservices:
Use the nano editor to edit the config file in the frontend microservice codebase:
cd ~/monolith-to-microservices/react-app
nano .env
Replace <ORDERS_IP_ADDRESS> and <PRODUCTS_IP_ADDRESS> with the Orders and Product microservice IP addresses, respectively.
REACT_APP_ORDERS_URL=http://<ORDERS_IP_ADDRESS>/api/orders
REACT_APP_PRODUCTS_URL=http://<PRODUCTS_IP_ADDRESS>/api/products
Save the file and rebuild the frontend app before containerizing it:
npm run build
Task 6: Create a containerized version of the Frontend microservice
Make sure that you:
- submit a build that is named
frontend - with a version of
1.0.0.
cd ~/monolith-to-microservices/microservices/src/frontend
gcloud builds submit --tag gcr.io/${GOOGLE_CLOUD_PROJECT}/frontend:1.0.0 .
Task 7: Deploy the Frontend microservice
Similar to Task 4, use kubectl commands to deploy the Frontend microservice:
kubectl create deployment frontend --image=gcr.io/${GOOGLE_CLOUD_PROJECT}/frontend:1.0.0

kubectl expose deployment frontend --type=LoadBalancer --port 80 --target-port 8080
Congratulations! You completed this challenge lab.
Summary
Most steps in the exercise are identical to those in the lab Migrating a Monolithic Website to Microservices on Google Kubernetes Engine. To complete this challenge, make sure you carefully replace the cluster and deployment names with the specified ones. If you still have questions, you can leave a comment below.
Demonstration Video
This browser does not support the YouTube video player. Watch on YouTube
⏱Timestamps:
00:00 Lab Start: Overview
01:00 Task1: Download the monolith code and build your container
03:03 Task2a: Create a kubernetes cluster
07:20 Task2b: Deploy the application
12:12 Task3a+4a: Create and deploy a containerized version of Orders Microservice
15:00 Task3b+4b: Create and deploy a containerized version of Products Microservice
15:52 Task5: Configure the Frontend microservice
17:40 Task6: Create a containerized version of the Frontend microservice
18:24 Task7: Deploy the Frontend microservice
Keep on reading: