☁ Optimize Costs for Google Kubernetes Engine: Challenge Lab | logbook

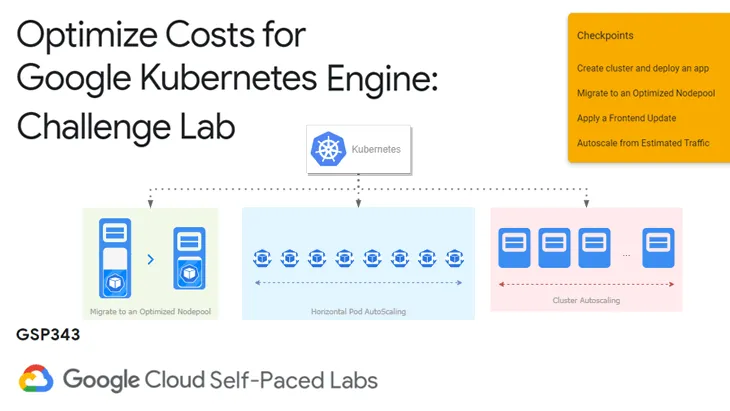
In this article, we will go through the lab GSP343 Optimize Costs for Google Kubernetes Engine: Challenge Lab, which is an advanced-level exercise on Qwiklabs. You will practice the following topics:
- Deploying an app on a multi-tenant cluster
- Migrating cluster workloads to an optimized node pool
- Rolling out an application update while maintaining cluster availability
- Cluster and pod autoscaling
Task 1: Create our cluster and deploy our app
Make sure that you:
- Create the cluster in the
us-central1region, - Use
onlineboutique-clusteras the cluster name according to the naming scheme for team-resource, - Make the zonal cluster with only two (2) nodes, and
- Start with machine type
n1-standard-2(2 vCPU, 8G memory).
Hints: Review the README and the files within the @GoogleCloudPlatform/microservices-demo repository on GitHub.
The following example will create the cluster to the zone us-central1-a using the command-line tools.
-
Set the zone as a variable in the Cloud Shell.
ZONE=us-central1-a -
Run the following to create the cluster with the specified configuration:
gcloud container clusters create onlineboutique-cluster \ --project=${DEVSHELL_PROJECT_ID} --zone=${ZONE} \ --machine-type=n1-standard-2 --num-nodes=2 -
After the GKE cluster is created, you need to set up the namespaces
devandprod.kubectl create namespace dev kubectl create namespace prod -
You will deploy the application to the
devnamespace. Switch the current namespace fromdefaulttodev:kubectl config set-context --current --namespace dev -
Copy the application files to the Shell environment, and then deploy the OnlineBoutique app to GKE:
git clone https://github.com/GoogleCloudPlatform/microservices-demo.git cd microservices-demo kubectl apply -f ./release/kubernetes-manifests.yaml --namespace dev -
Wait until the load balancer exposes an External IP for the
frontend-externalservice. You can monitor the service status using the following command:kubectl get svc -w --namespace devPress CTRL + C to stop the monitoring.
-
Open
http://<EXTERNAL_IP>in a new tab. You should see the homepage of the Online Boutique application like this:


Task 2: Migrate to an Optimized Nodepool
Make sure that you:
- create a new node pool named
optimized-pool, - configure
custom-2-3584as the machine type, and - set the number of nodes to
2; - migrate the application to the new node pool by cordoning off and draining
default-pool; and - delete the
default-poolafter the migration.
Hints: Review the lab GSP767 Exploring Cost-optimization for GKE Virtual Machines on Qwiklabs.
-
Run the following to create the node pool as specified:
gcloud container node-pools create optimized-pool \ --cluster=onlineboutique-cluster \ --machine-type=custom-2-3584 \ --num-nodes=2 \ --zone=$ZONE -
Wait until the status of the new node pool becomes OK.
-
Cordon and drain the
default-pool:for node in $(kubectl get nodes -l cloud.google.com/gke-nodepool=default-pool -o=name); do kubectl cordon "$node"; done for node in $(kubectl get nodes -l cloud.google.com/gke-nodepool=default-pool -o=name); do kubectl drain --force --ignore-daemonsets --delete-local-data --grace-period=10 "$node"; done -
Verify if your pods are running on the new, `optimized-pool, node pool:
kubectl get pods -o=wide --namespace dev -
With the pods migrated, it’s safe to delete the
default-pool:gcloud container node-pools delete default-pool \ --cluster onlineboutique-cluster --zone $ZONE


Task 3: Apply a Frontend Update
-
Set a pod disruption budget for your
frontenddeployment. Name itonlineboutique-frontend-pdband set the min-availability of your deployment to 1.kubectl create poddisruptionbudget onlineboutique-frontend-pdb \ --selector app=frontend --min-available 1 --namespace dev -
Use
kubectl editto update resources:KUBE_EDITOR="nano" kubectl edit deployment/frontend --namespace devChange the following in the configuration:
- image to
gcr.io/qwiklabs-resources/onlineboutique-frontend:v2.1, and - imagePullPolicy to
Always
Save the file changes.
- image to
-
(Optional) In the Cloud Console, navigate to Kubernetes Engine > Workloads and click the
frontenddeployment. Go to the REVISION HISTORY tab, you should see the latest revision updates toonlineboutique-frontend:v2.1.


Task 4: Autoscale from Estimated Traffic
-
You need to apply horizontal pod autoscaling to your frontend deployment with:
- scaling based on a target CPU percentage of 50, and
- setting the pod scaling between 1 minimum and 13 maximum.
Run the following to configure the autoscaler:
kubectl autoscale deployment frontend --cpu-percent=50 \ --min=1 --max=13 --namespace dev -
Check the status of the autoscalers by running:
kubectl get hpa --namespace dev -
Update your cluster autoscaler to scale between 1 node minimum and 6 nodes maximum.
gcloud beta container clusters update onlineboutique-cluster \ --enable-autoscaling --min-nodes 1 --max-nodes 6 --zone $ZONE -
To test the autoscalers, run the following to perform a load test to simulate the traffic surge.
kubectl exec $(kubectl get pod --namespace=dev | grep 'loadgenerator' | cut -f1 -d ' ') \
   -it --namespace=dev -- bash -c "export USERS=8000; sh ./loadgen.sh"
The command produces traffic on the store from a
loadgeneratorpod with a high number of concurrent users. -
Navigate to the OVERVIEW tab of the frontend deployment, you should see a sharp increase in CPU, Memory, and Disk utilization after the load test started.
Scroll to the Managed Pods section, you should observe the number of pods increases by the horizontal pod autoscaling.


Eventually, you will also see new nodes initiate by the cluster autoscaling. But you need to keep patient for a while.
Congratulations! You completed this challenge lab.
Demonstration Video
This browser does not support the YouTube video player. Watch on YouTube
⏱ Timestamps
0:00 Challenge Scenario
0:11 Task1: Create our cluster and deploy our app
2:54 Task2: Migrate to an Optimized Nodepool
5:20 Task3: Apply a Frontend Update
6:39 Task4: Autoscale from Estimated Traffic
8:26 Extra-task: Load Test to Simulate Traffic Surge
